The Anatomy of a Pointe Shoe
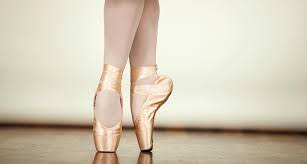
A few months ago, I got my first pair of pointe shoes. If you don’t know what these are, pointe shoes are the kind of shoes that professional ballerinas are always dancing in. When you’re dancing on pointe shoes, you’re right up on the tip of your toes, which can hurt a little. It’s so important to have the right shoes so that you don’t injure yourself. This is why you have to get them professionally fitted. It also helps if you know the parts of the shoes too, just in case your fitter asks you something like, “can you get all the way over on the box?” Right now, you’re probably thinking, “what are the parts of the shoe anyway?” Well, I’m so glad you asked because that’s exactly why I’m here. This is the anatomy of a pointe shoe.
There are three main parts of a pointe shoe: the box, the vamp, and the shank. The box is the very bottom of the shoe where the tips of your toes go. This part of the shoe is very hard and loud. It’s very important that you wear toe pads under your shoes so that you don’t get as many blisters. The next part of the shoe right above the box is the vamp. This part of the shoe is still hard but softer than the box. Surprisingly, this part of the shoe is mostly made out of cardboard. The bottom of the shoe is called the shank and is made up of a lot of different materials. Sometimes, professional ballerinas break the shank so that the shoes become softer for them to dance on. However, if you are not a professional, DO NOT do this! This will make your shoes die faster and you won’t be able to dance on them for as long once the shank is broken. Professional ballerinas sometimes go through 3-4 pairs of pointe shoes a week, and breaking the shoes in makes them easier to dance on. When you first get your pointe shoes, you’ll notice that there are no ribbons or elastic bands on the shoes. This is because you have to sew them in. This process takes so long, and it might take you a day or two if you do it in small pieces. Thankfully, I just sewed mine in the day I got them. It took me about an hour and a half to finish them. The elastic should be sewn and the back of the shoes on either side. The same can be done for the ribbons, except the elastic is all in one piece, and the ribbon is cut into two pieces so that you can wrap them around your ankle.
I hope you enjoyed this article about all the different parts of a pointe shoe, and if you’re getting pointe shoes soon, I hope this helped in some way!
Keira Hyatt ’26, Co-Middle School Editor
26khyatt@montroseschool.org